Load performance testing
- Tier: Premium, Ultimate
- Offering: GitLab.com, GitLab Self-Managed, GitLab Dedicated
Use load performance testing to measure the impact of code changes on your application’s
backend performance. GitLab uses k6 to simulate load against
application endpoints such as APIs and web controllers,
and outputs results in a file called load-performance.json.
Unlike browser performance testing, which measures how web pages render in a browser, load performance testing targets the server side and can assess response times and throughput under load.
Results are shown directly in the merge request, so you can catch performance regressions as part of your review process.
Load performance results in merge requests
Define a job in your .gitlab-ci.yml file that generates the
load performance report artifact.
GitLab checks this report, compares key load performance metrics between the source and
target branches, and shows the results in the merge request.
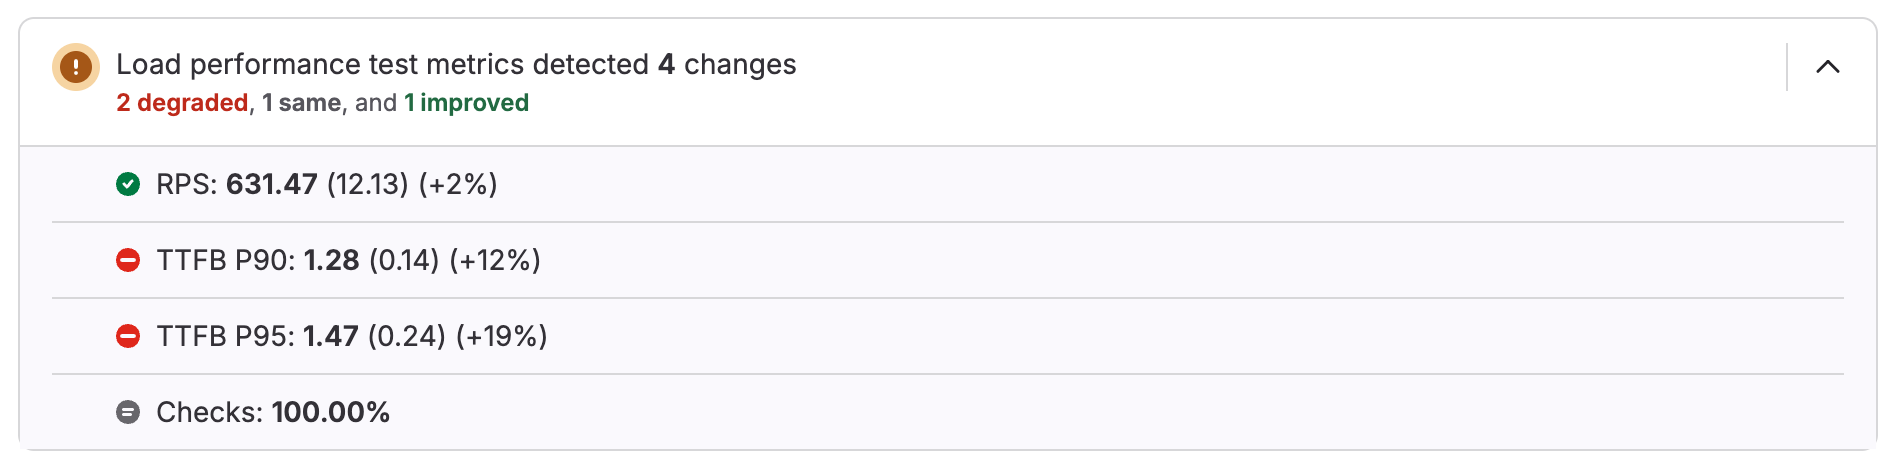
The key metrics shown in the merge request widget are:
- Checks: The percentage pass rate of the checks configured in the k6 test.
- TTFB P90: The 90th percentile of how long it took to start receiving responses, also known as Time to First Byte (TTFB).
- TTFB P95: The 95th percentile for TTFB.
- RPS: The average requests per second (RPS) rate the test was able to achieve.
The widget doesn’t display until the job has run at least once on the target branch.
Configure load performance testing
Use the
Verify/Load-Performance-Testing.gitlab-ci.yml
template included with GitLab to run k6 load tests
against your application.
Prerequisites:
- GitLab Runner configured to run Docker containers, like the Docker-in-Docker workflow.
- A pre-production test environment configured for load testing. For more information, see calculate concurrent users for load tests.
- A k6 test file in your project repository. For guidance, see write your first k6 test.
To configure load performance testing, add the following to your .gitlab-ci.yml file:
include:
  template: Verify/Load-Performance-Testing.gitlab-ci.yml

load_performance:
  variables:
    K6_TEST_FILE: <PATH TO K6 TEST FILE IN PROJECT>
GitLab creates a load_performance job that runs the k6 test and saves the results as a
load performance report artifact.
The latest artifact available is always used. If GitLab Pages
is enabled, you can view the report directly in your browser.
You can customize the job with CI/CD variables:
| Variable | Default | Description |
|---|---|---|
K6_IMAGE | grafana/k6 | Docker image to use. Does not control the version. |
K6_VERSION | 0.54.0 | Version of the Docker image. |
K6_TEST_FILE | none | Path to the k6 test file in the project repository. |
K6_OPTIONS | none | Additional k6 options. For more information, see k6 options reference. |
K6_DOCKER_OPTIONS | none | Additional options passed to docker run, such as --env-file to pass environment variables to the k6 container. |
For example, to override the duration of the test:
include:
  template: Verify/Load-Performance-Testing.gitlab-ci.yml

load_performance:
  variables:
    K6_TEST_FILE: <PATH TO K6 TEST FILE IN PROJECT>
    K6_OPTIONS: '--duration 30s'
This template doesn’t work with Kubernetes clusters. Instead, use
Jobs/Load-Performance-Testing.gitlab-ci.yml.
For large-scale k6 tests, ensure the GitLab Runner instance can handle the load. The default shared GitLab.com runners likely have insufficient specs for most large k6 tests. For details, see k6’s guidance on running large tests.
Configure load performance testing for review apps
Prerequisites:
- The
load_performancejob must run after the dynamic environment starts.
To configure load performance testing for review apps, capture the dynamic URL in a
.env file and pass
it to the k6 container using K6_DOCKER_OPTIONS. k6 can then use environment variables
from the file in test scripts with standard JavaScript, for example:
http.get(`${__ENV.ENVIRONMENT_URL}`).
For example:
stages:
  - deploy
  - performance

include:
  template: Verify/Load-Performance-Testing.gitlab-ci.yml

review:
  stage: deploy
  environment:
    name: review/$CI_COMMIT_REF_SLUG
    url: http://$CI_ENVIRONMENT_SLUG.example.com
  script:
    - run_deploy_script
    - echo "ENVIRONMENT_URL=$CI_ENVIRONMENT_URL" >> review.env
  artifacts:
    paths:
      - review.env
  rules:
    - if: $CI_COMMIT_BRANCH

load_performance:
  dependencies:
    - review
  variables:
    K6_DOCKER_OPTIONS: '--env-file review.env'
  rules:
    - if: $CI_COMMIT_BRANCH