Branch rules
- Tier: Free, Premium, Ultimate
- Offering: GitLab.com, GitLab Self-Managed, GitLab Dedicated
GitLab provides multiple methods to protect individual branches. These methods ensure your branches receive oversight and quality checks from their creation to their deletion:
- Apply enhanced security and protection to your project’s default branch.
- Configure protected branches to:
- Limit who can push and merge to a branch.
- Manage if users can force push to the branch.
- Manage if changes to files listed in the
CODEOWNERSfile can be pushed directly to the branch.
- Configure approval rules to manage review requirements and implement security-related approvals.
- Integrate with third-party status checks to ensure the contents of your branch meets your defined quality standards.
You can manage your branches:
- With the GitLab user interface.
- With Git on the command line.
- With the Branches API.
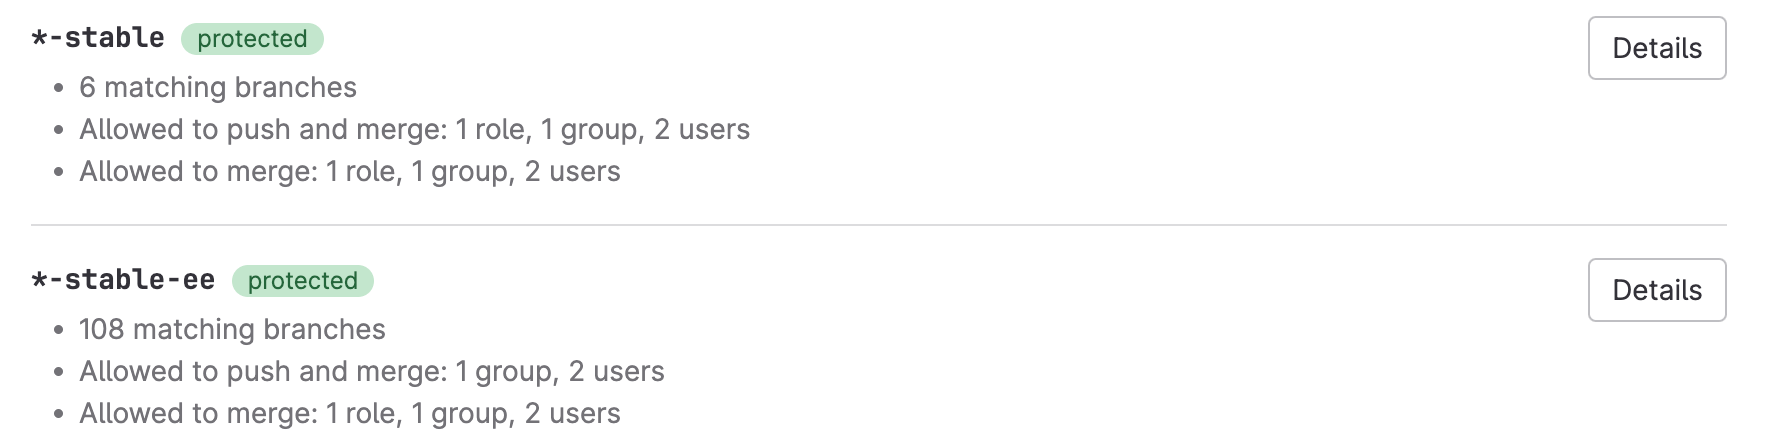
View branch rules
The branch rules overview page shows all branches with any configured protections, and their protection methods:
Prerequisites:
- You must have the Maintainer or Owner role for the project.
To view the branch rules overview list:
- In the top bar, select Search or go to and find your project.
- In the left sidebar, select Settings > Repository.
- Expand Branch rules to view all branches with protections.
View branch rule details
To view branch rules and protections for a single branch:
- In the top bar, select Search or go to and find your project.
- In the left sidebar, select Settings > Repository.
- Expand Branch rules to view all branches with protections.
- Identify the branch you want and select View details.
Create a branch rule
Prerequisites:
- You must have the Maintainer or Owner role for the project.
To create a branch rule:
- In the top bar, select Search or go to and find your project.
- In the left sidebar, select Settings > Repository.
- Expand Branch rules.
- Select Add branch rule.
- Choose one of the following options:
- To enter a specific branch name or pattern:
- Select Branch name or pattern.
- From the Create branch rule dropdown list, select a branch name or create a wildcard with
*.
- To protect all branches in the project:
- Select All branches.
- On the rule’s details page, under Merge request approvals, enter the required number of approvals for the rule.
- To protect all branches in the project that are already specified as protected:
- Select All protected branches.
- On the rule’s details page, under Merge request approvals, enter the required number of approvals for the rule.
- To enter a specific branch name or pattern:
Add a branch rule protection
Not available for all branches.
To add protections to a new branch:
- In the top bar, select Search or go to and find your project.
- In the left sidebar, select Settings > Repository.
- Expand Branch rules.
- Select Add branch rule.
- Select one of All protected branches or Branch name or pattern.
- Select Create branch rule.
Add an approval rule
- Tier: Premium, Ultimate
- Offering: GitLab.com, GitLab Self-Managed, GitLab Dedicated
Not available for all branches.
Prerequisites:
- You must have the Maintainer or Owner role for the project.
To add a merge request approval rule:
- From the branch rule details page, go to the Merge request approvals section.
- In the Approval rules section, select Add approval rule.
- In the right sidebar, complete the fields:
Enter a Rule name.
In Required number of approvals, enter a value (
0-100).A value of
0makes the rule optional, and any number greater than0creates a required rule. The maximum number of required approvals is100.Select users or groups that are eligible to approve.
GitLab suggests approvers based on previous authors of the files changed by the merge request.
- Select Save changes.
For additional information, see approval rules.
Edit squash commits option
- Tier: Premium, Ultimate
- Offering: GitLab.com, GitLab Self-Managed, GitLab Dedicated
Prerequisites:
- You must have the Maintainer or Owner role for the project.
- In GitLab Free, this feature is available only if the branch rule targets All branches.
- In GitLab Premium and GitLab Ultimate, this feature is available for all branch rules.
To edit a squash option:
From the branch rule details page, go to the Squash commits when merging section.
Select Edit.
Select one of the following options:
- Default: Removes the branch-level squash setting and inherits from the project’s default settings. This option is not available for the All branches rule, which defines the project’s default settings.
- Do not allow: Squashing is never allowed and the checkbox is hidden.
- Allow: Checkbox is visible and unselected by default.
- Encourage: Checkbox is visible and selected by default.
- Require: Squashing is always performed. Checkbox is visible and selected, and users cannot change it.
Select Save changes.
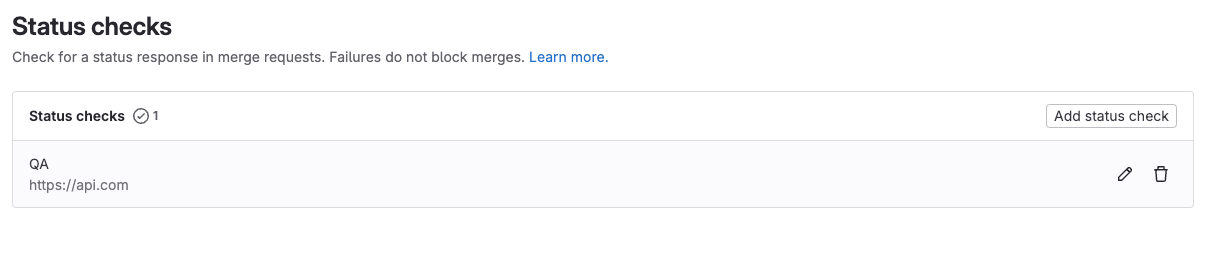
Add a status check service
- Tier: Ultimate
- Offering: GitLab.com, GitLab Self-Managed, GitLab Dedicated
Not available for all protected branches.
To add a status check service:
From the branch rule details page, go to the Status checks section.
Select Add status check.
Enter the Service name.
In the API to check field, enter the URL.
You should use an HTTPS URL to protect your merge request data in transit.
For more information, see external status checks.
Edit a branch rule target
Prerequisites:
- You must have the Maintainer or Owner role for the project.
To edit a branch rule target:
- In the top bar, select Search or go to and find your project.
- In the left sidebar, select Settings > Repository.
- Expand Branch rules to view all branches with protections.
- Identify the branch you want and select View details.
- In the Rule target section, select Edit.
- Edit the information as needed.
- Select Update.
Edit a branch rule protection
For information about branch protection controls, see Protected branches.
Not available for all branches.
Delete a branch rule
Prerequisites:
- You must have the Maintainer or Owner role for the project.
To delete a branch rule:
- In the top bar, select Search or go to and find your project.
- In the left sidebar, select Settings > Repository.
- Expand Branch rules.
- Next to a rule you want to delete, select View details.
- In the upper-right corner, select Delete rule.
- On the confirmation dialog, select Delete branch rule.
Deleting a branch rule is not available for rules targeting all branches.