Rich text editor
- Tier: Free, Premium, Ultimate
- Offering: GitLab.com, GitLab Self-Managed, GitLab Dedicated
The rich text editor is the default text editor for new users in GitLab.
You can use the rich text editor in:
Features of the editor include:
- Format text, including as bold, italics, block quotes, headings, and inline code.
- Format ordered lists, unordered lists, and checklists.
- Insert links, attachments, images, video, and audio.
- Create and edit a table structure.
- Insert and format code blocks with syntax highlighting.
- Preview Mermaid, PlantUML, and Kroki diagrams in real time.
To track work on adding the rich text editor to more places across GitLab, see epic 7098.
Switch to the rich text editor
Use the rich text editor to edit descriptions, wiki pages, add comments.
To switch to the rich text editor: In a text box, in the lower-left corner, select Switch to rich text editing.
Switch to the plain text editor
If you want to enter Markdown source in the text box, return to using the plain text editor.
To switch to the plain text editor: In a text box, in the lower-left corner, select Switch to plain text editing.
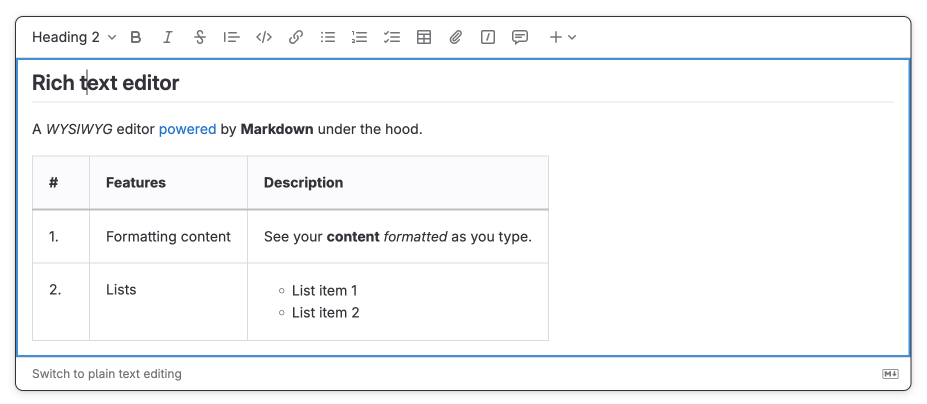
Compatibility with GitLab Flavored Markdown
The rich text editor is fully compatible with GitLab Flavored Markdown. It means that you can switch between plain text and rich text modes without losing any data.
Input rules
Rich text editor also supports input rules that let you work with rich content as if you were typing Markdown.
Supported input rules:
| Input rule syntax | Content inserted |
|---|---|
# Heading 1 through ###### Heading 6 | Headings 1 through 6 |
**bold** or __bold__ | Bold text |
_italics_ or *italics* | Italicized text |
~~strike~~ | Strikethrough |
[link](https://example.com) | Hyperlink |
code | Inline code |
```rb + Enter```js + Enter | Code block |
* List item, or- List item, or+ List item | Unordered list |
1. List item | Numbered list |
<details> | Collapsible section |
Tables
Unlike in raw Markdown, you can use the rich text editor to insert block content paragraphs, list items, diagrams (or even another table!) in table cells.
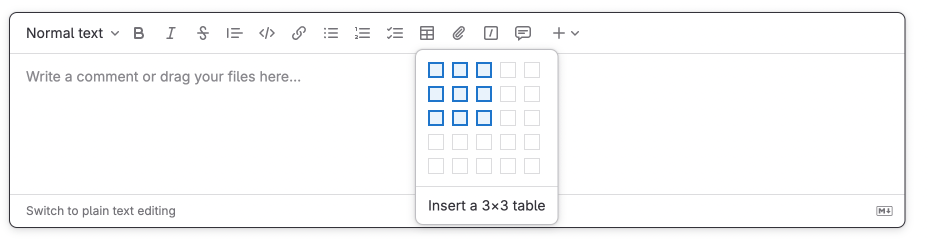
Insert a table
To insert a table:
- Select Insert table .
- From the dropdown list, select the dimensions of the new table.
Edit a table
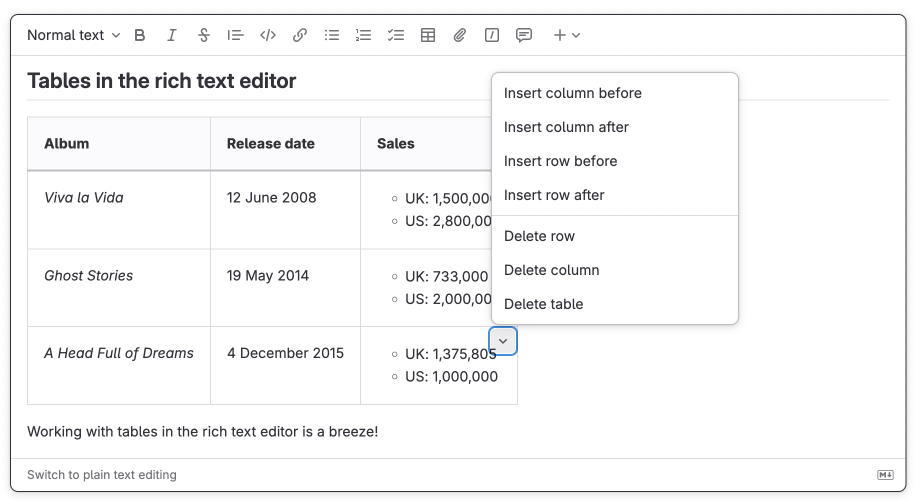
Inside a table cell, you can use a menu to insert or delete rows or columns.
To open the menu: In the upper-right corner of a cell, select the chevron .
Operations on multiple cells
Select multiple cells and merge or split them.
To merge selected cells into one:
- Select multiple cells - select one and drag your cursor.
- In the upper-right corner of a cell, select the chevron > Merge N cells.
To split merged cells: In the upper-right corner of a cell, select the chevron > Split cell.
Paste into a table cell
When you press Control+V (or Command+V on macOS), GitLab merges the copied cells into the table by default.
To choose how the content is pasted:
- In the upper-right corner of the target cell, select the chevron .
- Select one of these options:
- Paste into cell: Inserts the copied content at the cursor. A copied table becomes a table nested inside the cell.
- Paste and merge into table: Distributes the copied cells across the table (default behavior).
Each option also shows its keyboard shortcut next to its label. To paste a copied table as a nested table without opening the menu, place your cursor in a table cell. Then press Control+Alt+V (or Command+Option+V on macOS).
The first time you use either option, your browser might ask for permission to read your clipboard.
On GitLab Self-Managed, the paste options and the keyboard shortcut are not available if your
instance is served over plain HTTP. These features require browser access to the clipboard, and
browsers allow that access only on pages served over HTTPS or from localhost.
Insert diagrams
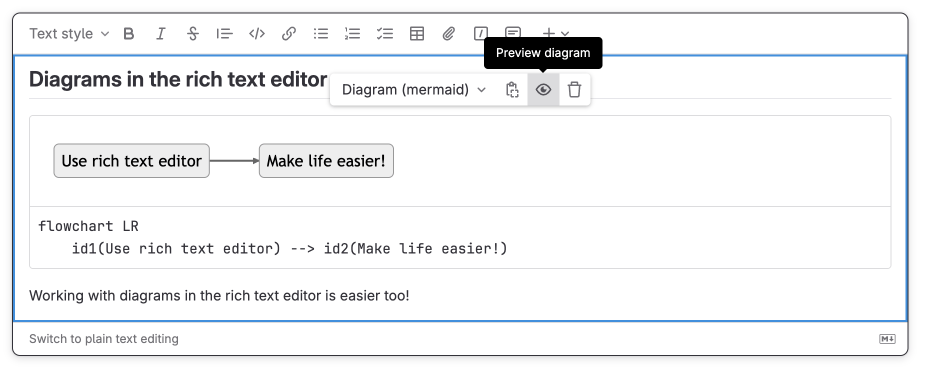
Insert Mermaid and PlantUML diagrams and preview them live as you type the diagram code.
To insert a diagram:
- In the top bar of a text box, select More options and then Mermaid diagram or PlantUML diagram.
- Enter the code for your diagram. The diagram preview appears in the text box.
Related topics
- Set the default text editor
- Keyboard shortcuts for rich text editor
- GitLab Flavored Markdown