- Show a list of changed files
- Show all changes in a merge request
- Collapse generated files
- Show one file at a time
- Compare changes
- Explain code in a merge request
- Expand or collapse comments
- Ignore whitespace changes
- Mark files as viewed
- Show merge request conflicts in diff
- Show scanner findings in diff
- Add a comment to a merge request file
- Add a comment to an image
- Resources
Changes in merge requests
A merge request proposes a set of changes to files in a branch in your repository. GitLab shows these changes as a diff (difference) between the current state and the proposed changes. By default, the diff compares your proposed changes (the source branch) with the target branch. By default, GitLab shows only the changed portions of the files.
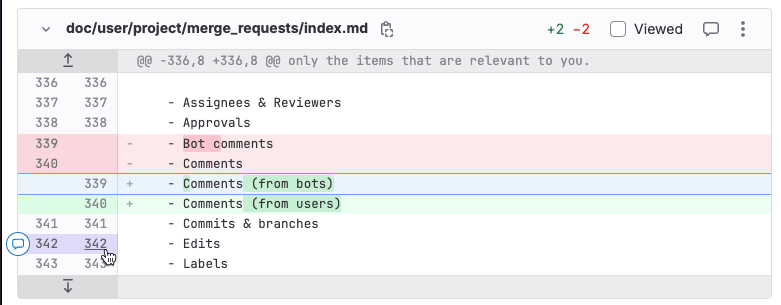
This example shows changes to a text file. In the default syntax highlighting theme:
- The current version is shown in red, with a minus (
-) sign before the line. - The proposed version is shown in green with a plus (
+) sign before the line.
The header for each file in the diff contains:
- Hide file contents () to hide all changes to this file.
- Path: The full path to this file. To copy this path, select Copy file path ().
-
Lines changed: The number of lines added and deleted in this file, in the format
+2 -2. - Viewed: Select this checkbox to mark the file as viewed until it changes again.
- Comment on this file () to leave a general comment on the file, without pinning the comment to a specific line.
- Options: Select () to display more file viewing options.
The diff also includes navigation and comment aids to the left of the file, in the gutter:
- Show more context: Select Previous 20 lines () to display the previous 20 unchanged lines, or Next 20 lines () to show the next 20 unchanged lines.
-
Line numbers are shown in two columns. Previous line numbers are shown on
the left, and proposed line numbers on the right. To interact with a line:
- To show comment options, hover over a line number.
- To copy a link to the line, press Command and select (or right-click) a line number, then select Copy link address.
- To highlight a line, select the line number.
Show a list of changed files
Use the file browser to view a list of files changed in a merge request:
- On the left sidebar, select Search or go to and find your project.
- Select Code > Merge requests and find your merge request.
- Below the merge request title, select Changes.
- Select Show file browser () or press F to show
the file tree.
- For a tree view that shows nesting, select Tree view ().
- For a file list without nesting, select List view ().
Show all changes in a merge request
To view the diff of changes included in a merge request:
- On the left sidebar, select Search or go to and find your project.
- Select Code > Merge requests and find your merge request.
- Below the merge request title, select Changes.
- If the merge request changes many files, you can jump directly to a specific file:
- Select Show file browser () or press F to show the file tree.
- Select the file you want to view.
- To hide the file browser, select Show file browser or press F again.
GitLab collapses files with many changes to improve performance, and displays the message: Some changes are not shown. To view the changes for that file, select Expand file.
Show a linked file first
-
Introduced in GitLab 16.9 with a flag named
pinned_file. Disabled by default. -
Generally available in GitLab 17.4. Feature flag
pinned_fileremoved.
When you share a merge request link with a team member, you might want to show a specific file first in the list of changed files. To copy a merge request link that shows your desired file first:
- On the left sidebar, select Search or go to and find your project.
- Select Code > Merge requests and find your merge request.
- Below the merge request title, select Changes.
- Find the file you want to show first. Right-click the name of the file to copy the link to it.
-
When you visit that link, your chosen file is shown at the top of the list. The file browser shows a link icon () next to the file name:
Collapse generated files
-
Introduced in GitLab 16.8 with a flag named
collapse_generated_diff_files. Disabled by default. - Enabled on GitLab.com and self-managed in GitLab 16.10.
-
generated_filegenerally available in GitLab 16.11. Feature flagcollapse_generated_diff_filesremoved.
To help reviewers focus on the files needed to perform a code review, GitLab collapses several common types of generated files. GitLab collapses these files by default, because they rarely require code reviews:
- Files with
.nib,.xcworkspacedata, or.xcurserstateextensions. - Package lock files such as
package-lock.jsonorGopkg.lock. - Files in the
node_modulesfolder. - Minified
jsorcssfiles. - Source map reference files.
- Generated Go files, including the generated files by protocol buffer compiler.
To mark a file or path as generated, set the gitlab-generated attribute for it
in your .gitattributes file.
View a collapsed file
- On the left sidebar, select Search or go to and find your project.
- Select Code > Merge requests and find your merge request.
- Below the merge request title, select Changes.
- Find the file you want to view, and select Expand file.
Configure collapse behavior for a file type
To change the default collapse behavior for a file type:
- If a
.gitattributesfile does not exist in the root directory of your project, create a blank file with this name. -
For each file type you want to modify, add a line to the
.gitattributesfile declaring the file extension and your desired behavior:# Collapse all files with a .txt extension *.txt gitlab-generated # Collapse all files within the docs directory docs/** gitlab-generated # Do not collapse package-lock.json package-lock.json -gitlab-generated - Commit, push, and merge your changes into your default branch.
After the changes merge into your default branch, all files of this type in your project use this behavior in merge requests.
For technical details about how GitLab detects generated files, see the
go-enry repository.
Show one file at a time
For larger merge requests, you can review one file at a time. You can change this setting in your user preferences, or when you review a merge request. If you change this setting in a merge request, it updates your user settings as well.
- On the left sidebar, select Search or go to and find your project.
- Select Code > Merge requests and find your merge request.
- Below the merge request title, select Changes.
- Select Preferences ().
- Select or clear Show one file at a time.
- On the left sidebar, select your avatar.
- Select Preferences.
- Scroll to the Behavior section and select the Show one file at a time on merge request’s Changes tab checkbox.
- Select Save changes.
To select another file to view when this setting is enabled, either:
- Scroll to the end of the file and select either Prev or Next.
- If keyboard shortcuts are enabled, press [, ], k, or j.
- Select Show file browser () and select another file to view.
Compare changes
You can view the changes in a merge request either:
- Inline, which shows the changes vertically. The old version of a line is shown first, with the new version shown directly below it. Inline mode is often better for changes to single lines.
- Side-by-side, which shows the old and new versions of lines in separate columns. Side-by-side mode is often better for changes affecting large numbers of sequential lines.
To change how a merge request shows changed lines:
- On the left sidebar, select Search or go to and find your project.
- Select Code > Merge requests and find your merge request.
- Below the title, select Changes.
-
Select Preferences (). Select either Side-by-side or Inline. This example shows how GitLab renders the same change in both inline and side-by-side mode:
Explain code in a merge request
- Introduced in GitLab 15.11 as an experiment on GitLab.com.
- Generally available in GitLab 16.8.
If you spend a lot of time trying to understand code that others have created, or you struggle to understand code written in a language you are not familiar with, you can ask GitLab Duo to explain the code to you.
Prerequisites:
- You must belong to at least one group with the experiment and beta features setting enabled.
- You must have access to view the project.
To explain the code in a merge request:
- On the left sidebar, select Search or go to and find your project.
- Select Code > Merge requests, then select your merge request.
- Select Changes.
-
On the file you would like explained, select the three dots () and select View File @ $SHA.
A separate browser tab opens and shows the full file with the latest changes.
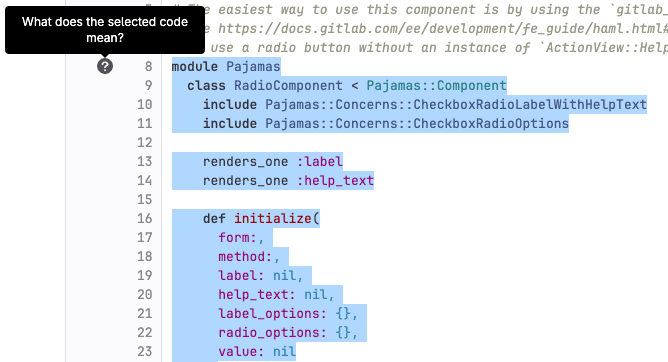
- On the new tab, select the lines you want to have explained.
-
On the left side, select the question mark (). You might have to scroll to the first line of your selection to view it.
Duo Chat explains the code. It might take a moment for the explanation to be generated.
If you’d like, you can provide feedback about the quality of the explanation.
We cannot guarantee that the large language model produces results that are correct. Use the explanation with caution.
You can also explain code in:
Expand or collapse comments
When reviewing code changes, you can hide inline comments:
- On the left sidebar, select Search or go to and find your project.
- Select Code > Merge requests and find your merge request.
- Below the title, select Changes.
- Scroll to the file that contains the comments you want to hide.
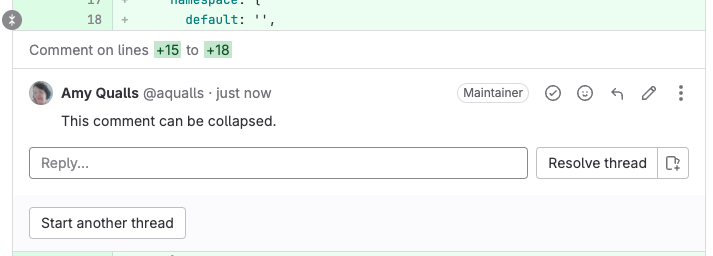
- Scroll to the line the comment is attached to, and select Collapse ():

To expand inline comments and show them again:
- On the left sidebar, select Search or go to and find your project.
- Select Code > Merge requests and find your merge request.
- Below the title, select Changes.
- Scroll to the file that contains the collapsed comments you want to show.
- Scroll to the line the comment is attached to, and select the user avatar:

Ignore whitespace changes
Whitespace changes can make it more difficult to see the substantive changes in a merge request. You can choose to hide or show whitespace changes:
- On the left sidebar, select Search or go to and find your project.
- Select Code > Merge requests and find your merge request.
- Below the title, select Changes.
- Before the list of changed files, select Preferences ().
-
Select or clear Show whitespace changes:
Mark files as viewed
When reviewing a merge request with many files multiple times, you can ignore files you’ve already reviewed. To hide files that haven’t changed since your last review:
- On the left sidebar, select Search or go to and find your project.
- Select Code > Merge requests and find your merge request.
- Below the title, select Changes.
- In the file’s header, select the Viewed checkbox.
Files marked as viewed are not shown to you again unless either:
- The contents of the file change.
- You clear the Viewed checkbox.
Show merge request conflicts in diff
- Enabled on GitLab.com and self-managed in GitLab 15.7.
-
Generally available in GitLab 15.8. Feature flag
display_merge_conflicts_in_diffremoved.
To avoid displaying changes already on target branch, we compare the merge request’s
source branch with the HEAD of the target branch.
When the source and target branch conflict, we show an alert per conflicted file on the merge request diff:
Show scanner findings in diff
You can show scanner findings in the diff. For details, see:
Add a comment to a merge request file
-
Introduced in GitLab 16.1 with a flag named
comment_on_files. Enabled by default. - Feature flag removed in GitLab 16.2.
You can add comments to a merge request diff file. These comments persist across rebases and file changes.
To add a comment to a merge request file:
- On the left sidebar, select Search or go to and find your project.
- Select Code > Merge requests and find your merge request.
- Select Changes.
- In the header for the file you want to comment on, select Comment ().
Add a comment to an image
In merge requests and commit detail views, you can add a comment to an image. This comment can also be a thread.
- Hover your mouse over the image.
- Select the location where you want to comment.
GitLab shows an icon and a comment field on the image.
Resources
- For technical details on how GitLab calculates the diff between the two revisions, see Working with diffs.


