- Before you begin
- Create a GitLab project
- Create a Django application
- Instrument the application with OpenTelemetry
Tutorial: Use GitLab Observability with a Django application
In this tutorial, we’ll show you how to create, configure, instrument, and monitor a Django application using GitLab observability features.
Before you begin
To follow along this tutorial, you should have:
- A GitLab Ultimate subscription for GitLab.com or GitLab self-managed
- A local installation of Python 3 and Django (You can install it with
python -m pip install Django.) - Basic knowledge of Git and Python
- Basic knowledge of the core concepts of OpenTelemetry
Create a GitLab project
First, create a GitLab project and a corresponding access token.
This tutorial uses the project name animals.
- On the left sidebar, at the top, select Create new () and New project/repository.
- Select Create blank project.
- Enter the project details.
- In the Project name field, enter
animals.
- In the Project name field, enter
- Select Create project.
- In the
animalsproject, on the left sidebar, select Settings > Access tokens. - Create an access token with the
apiscope and Developer role. Store the token value somewhere safe—you’ll need it later.
Create a Django application
To create an application:
-
From the command line, run the command:
python -m django startproject animals_app -
Check that the Django server is running correctly:
python manage.py runserver - Ensure that the server is running correctly by visiting
http://localhost:8000. -
A Django projects contains multiple applications within a project. To create an application to manage our list of fake animals, run the command:
python manage.py startapp animals -
To create the initial view for the new
animalsapplication, in theanimals/views.pyfile add the following code:from django.http import HttpResponse def index(request): return HttpResponse("This is where the list of animals will be shown.") -
In
animals/urls.py, add the following code:from django.urls import path from . import views urlpatterns = [ path('', views.index, name='index'), ] -
Additionally, update the room
urls.pyto include theanimalsapp:path('animals/', include('animals.urls')) -
In
animals_app/settings.py, add the application:INSTALLED_APPS = [ ... 'animals.apps.AnimalsConfig', ] -
In
animals/models.py, create a model to define an animal:from django.db import models class Animal(models.Model): name = models.CharField(max_length=200) number_of_legs = models.IntegerField(default=2) dangerous = models.BooleanField(default=False) -
With the model defined, create a database migration. This will create a file that describes the changes to the database.
python manage.py makemigrations animals -
Run the newly created migration:
python manage.py migrate
Instrument the application with OpenTelemetry
-
Install the required dependencies:
pip install opentelemetry-api opentelemetry-sdk opentelemetry-exporter-otlp-proto-http -
Metrics and traces require different imports. In the
manage.pyfile, import the required modules:from opentelemetry.instrumentation.django import DjangoInstrumentor from opentelemetry.sdk.resources import SERVICE_NAME, Resource from opentelemetry import trace from opentelemetry.exporter.otlp.proto.http.trace_exporter import OTLPSpanExporter from opentelemetry.sdk.trace import TracerProvider from opentelemetry.sdk.trace.export import BatchSpanProcessor from opentelemetry import metrics from opentelemetry.exporter.otlp.proto.http.metric_exporter import OTLPMetricExporter from opentelemetry.sdk.metrics import MeterProvider from opentelemetry.sdk.metrics.export import PeriodicExportingMetricReader, ConsoleMetricExporter -
To instrument the application, in the
manage.pyfile, add the following code.- Replace
{{PROJECT_ACCESS_TOKEN}}and{{PROJECT_ID}}with the values from your project. - If you’re using self-managed GitLab, replace
gitlab.comwith your self-managed instance hostname.
resource = Resource(attributes={ SERVICE_NAME: "animals-django" }) os.environ.setdefault('OTEL_EXPORTER_OTLP_HEADERS', "PRIVATE-TOKEN={{PROJECT_ACCESS_TOKEN}}") traceProvider = TracerProvider(resource=resource) processor = BatchSpanProcessor(OTLPSpanExporter(endpoint="https://gitlab.com/api/v4/projects/{{PROJECT_ID}}/observability/v1/traces")) traceProvider.add_span_processor(processor) trace.set_tracer_provider(traceProvider) reader = PeriodicExportingMetricReader( OTLPMetricExporter(endpoint="https://gitlab.com/api/v4/projects/{{PROJECT_ID}}/observability/v1/metrics") ) meterProvider = MeterProvider(resource=resource, metric_readers=[reader]) metrics.set_meter_provider(meterProvider) meter = metrics.get_meter("default.meter") """Run administrative tasks.""" os.environ.setdefault('DJANGO_SETTINGS_MODULE', 'animals_app.settings') DjangoInstrumentor().instrument() - Replace
This code defines the service name animals-django, authenticates with GitLab, and instruments the application.
-
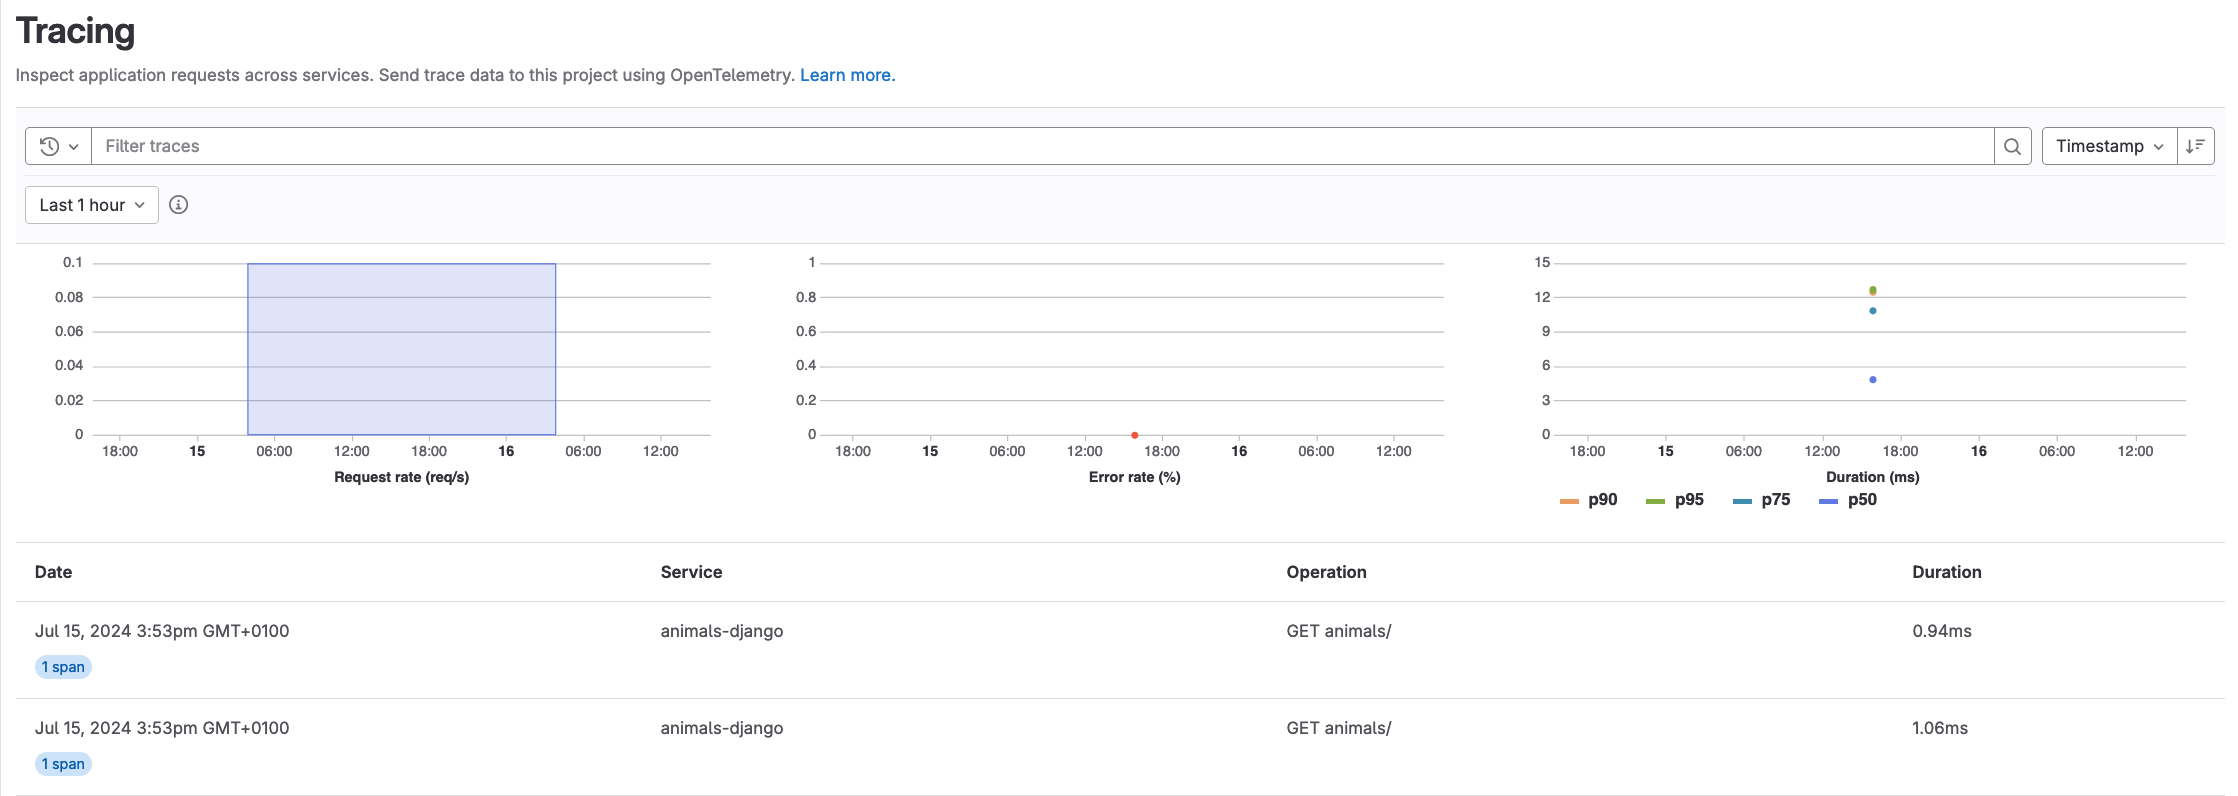
To start collecting traces, restart the Django server. After refreshing
/animalsa few times, you should see traces in the GitLab UI. -
Optional. Django will also export certain metrics by default to GitLab, but custom metrics are supported too. For example, to increment a counter metric every time a page is loaded, add the following code:
meter = metrics.get_meter("default.meter")
 work_counter = meter.create_counter(
     "animals.viewed.counter", unit="1", description="Counts the number of times the list of animals was viewed"
 )

 work_counter.add(1)

