Dashboard for Kubernetes
-
Introduced in GitLab 16.1, with flags named
environment_settings_to_graphql,kas_user_access,kas_user_access_project, andexpose_authorized_cluster_agents. This feature is in beta. - Feature flag
environment_settings_to_graphqlremoved in GitLab 16.2. - Feature flags
kas_user_access,kas_user_access_project, andexpose_authorized_cluster_agentsremoved in GitLab 16.2. - Moved to the environment details page in 16.10.
Use the dashboard for Kubernetes to understand the status of your clusters with an intuitive visual interface. The dashboard works with every connected Kubernetes cluster, whether you deployed them with CI/CD or GitOps.
Configure a dashboard
- Filtering resources by namespace introduced in GitLab 16.2 with a flag named
kubernetes_namespace_for_environment. Disabled by default. - Filtering resources by namespace enabled by default in GitLab 16.3. Feature flag
kubernetes_namespace_for_environmentremoved. - Selecting the related Flux resource introduced in GitLab 16.3 with a flag named
flux_resource_for_environment. - Selecting the related Flux resource generally available in GitLab 16.4. Feature flag
flux_resource_for_environmentremoved.
Configure a dashboard to use it for a given environment. You can configure dashboard for an environment that already exists, or add one when you create an environment.
Prerequisites:
- A GitLab agent for Kubernetes is installed and
user_accessis configured for the environment’s project or its parent group.
- On the left sidebar, select Search or go to and find your project.
- Select Operate > Environments.
- Select the environment to be associated with the agent for Kubernetes.
- Select Edit.
- Select a GitLab agent for Kubernetes.
- Optional. From the Kubernetes namespace dropdown list, select a namespace.
- Optional. From the Flux resource dropdown list, select a Flux resource.
- Select Save.
- On the left sidebar, select Search or go to and find your project.
- Select Operate > Environments.
- Select New environment.
- Complete the Name field.
- Select a GitLab agent for Kubernetes.
- Optional. From the Kubernetes namespace dropdown list, select a namespace.
- Optional. From the Flux resource dropdown list, select a Flux resource.
- Select Save.
View a dashboard
- Kubernetes watch API integration introduced in GitLab 16.6 with a flag named
k8s_watch_api. Disabled by default. - Kubernetes watch API integration enabled by default in GitLab 16.7.
-
Generally available in GitLab 17.1. Feature flag
k8s_watch_apiremoved.
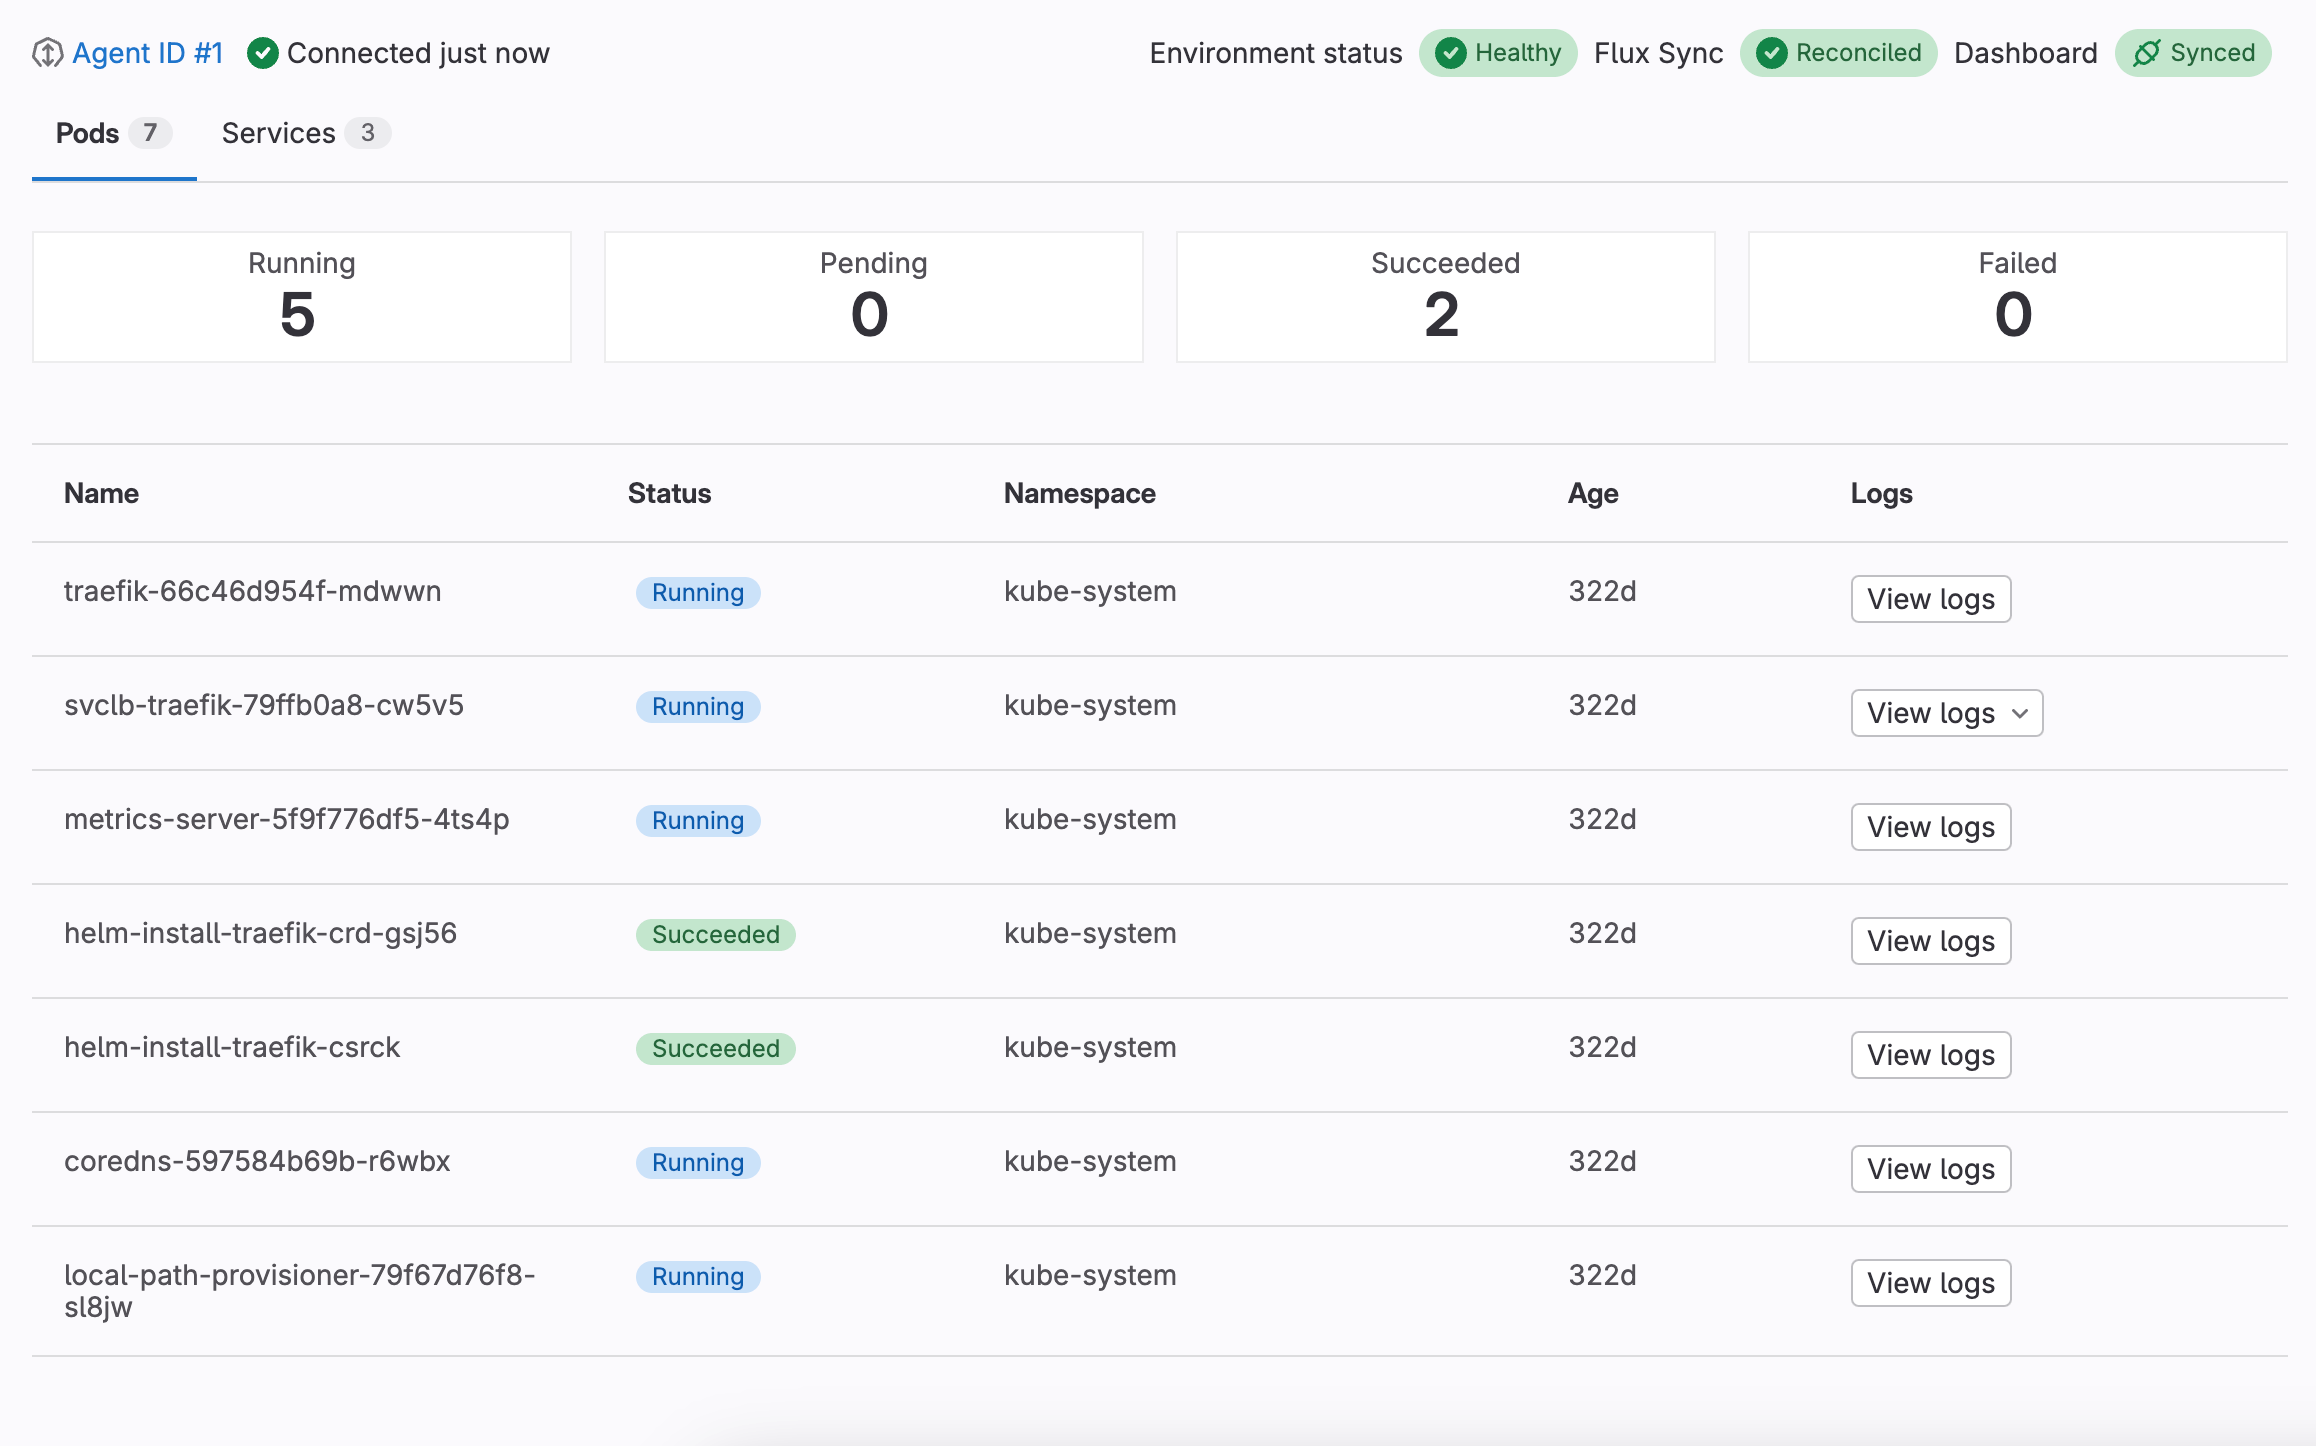
View a dashboard to see the status of connected clusters.
If the k8s_watch_api feature flag is enabled, the status of your
Kubernetes resources and Flux reconciliation updates in real time.
To view a configured dashboard:
- On the left sidebar, select Search or go to and find your project.
- Select Operate > Environments.
- Select the environment associated with the agent for Kubernetes.
- Select the Kubernetes overview tab.
A list of pods is displayed. Select a pod to view its details.
Flux sync status
- Introduced in GitLab 16.3.
- Customizing the name of the Flux resource introduced in GitLab 16.3 with a flag named
flux_resource_for_environment. - Customizing the name of the Flux resource generally available in GitLab 16.4. Feature flag
flux_resource_for_environmentremoved.
You can review the sync status of your Flux deployments from a dashboard.
To display the deployment status, your dashboard must be able to retrieve the Kustomization and HelmRelease resources,
which requires a namespace to be configured for the environment.
GitLab searches the Kustomization and HelmRelease resources specified by the Flux resource dropdown list in the environment settings.
A dashboard displays one of the following status badges:
| Status | Description |
|---|---|
| Reconciled | The deployment successfully reconciled with its environment. |
| Reconciling | A reconciliation is in progress. |
| Stalled | A reconciliation is stuck because of an error that cannot be resolved without human intervention. |
| Failed | The deployment couldn’t reconcile because of an unrecoverable error. |
| Unknown | The sync status of the deployment couldn’t be retrieved. |
| Unavailable | The Kustomization or HelmRelease resource couldn’t be retrieved.
|
Trigger Flux reconciliation
- Introduced in GitLab 17.3.
You can manually reconcile your deployment with its Flux resources.
To trigger a reconciliation:
- On a dashboard, select the sync status badge of a Flux deployment.
- Select Actions () > Trigger reconciliation ().
Suspend or resume Flux reconciliation
- Introduced in GitLab 17.5.
You can manually suspend or resume your Flux reconciliation from the UI.
To suspend or resume reconciliation:
- On a dashboard, select the sync status badge of a Flux deployment.
- Select Actions (), then choose one of the following:
- Suspend reconciliation () to pause the Flux reconciliation.
- Resume reconciliation () to restart the Flux reconciliation.
View pod logs
- Introduced in GitLab 17.2.
View pod logs when you want to quickly understand and troubleshoot issues across your environments from a configured dashboard. You can view logs for each container in a pod.
- Select View logs, then select the container you want to view logs for.
You can also view pod logs from the pod details.
Delete a pod
- Introduced in GitLab 17.3.
To restart a failed pod, delete it from the Kubernetes dashboard.
To delete a pod:
- On the Kubernetes overview tab, find the pod you want to delete.
- Select Actions () > Delete pod ().
You can also delete a pod from the pod details.
Detailed dashboard
-
Introduced in GitLab 16.4, with a flag named
k8s_dashboard. Disabled by default. - Enabled on GitLab.com in GitLab 16.7 for a subset of users.
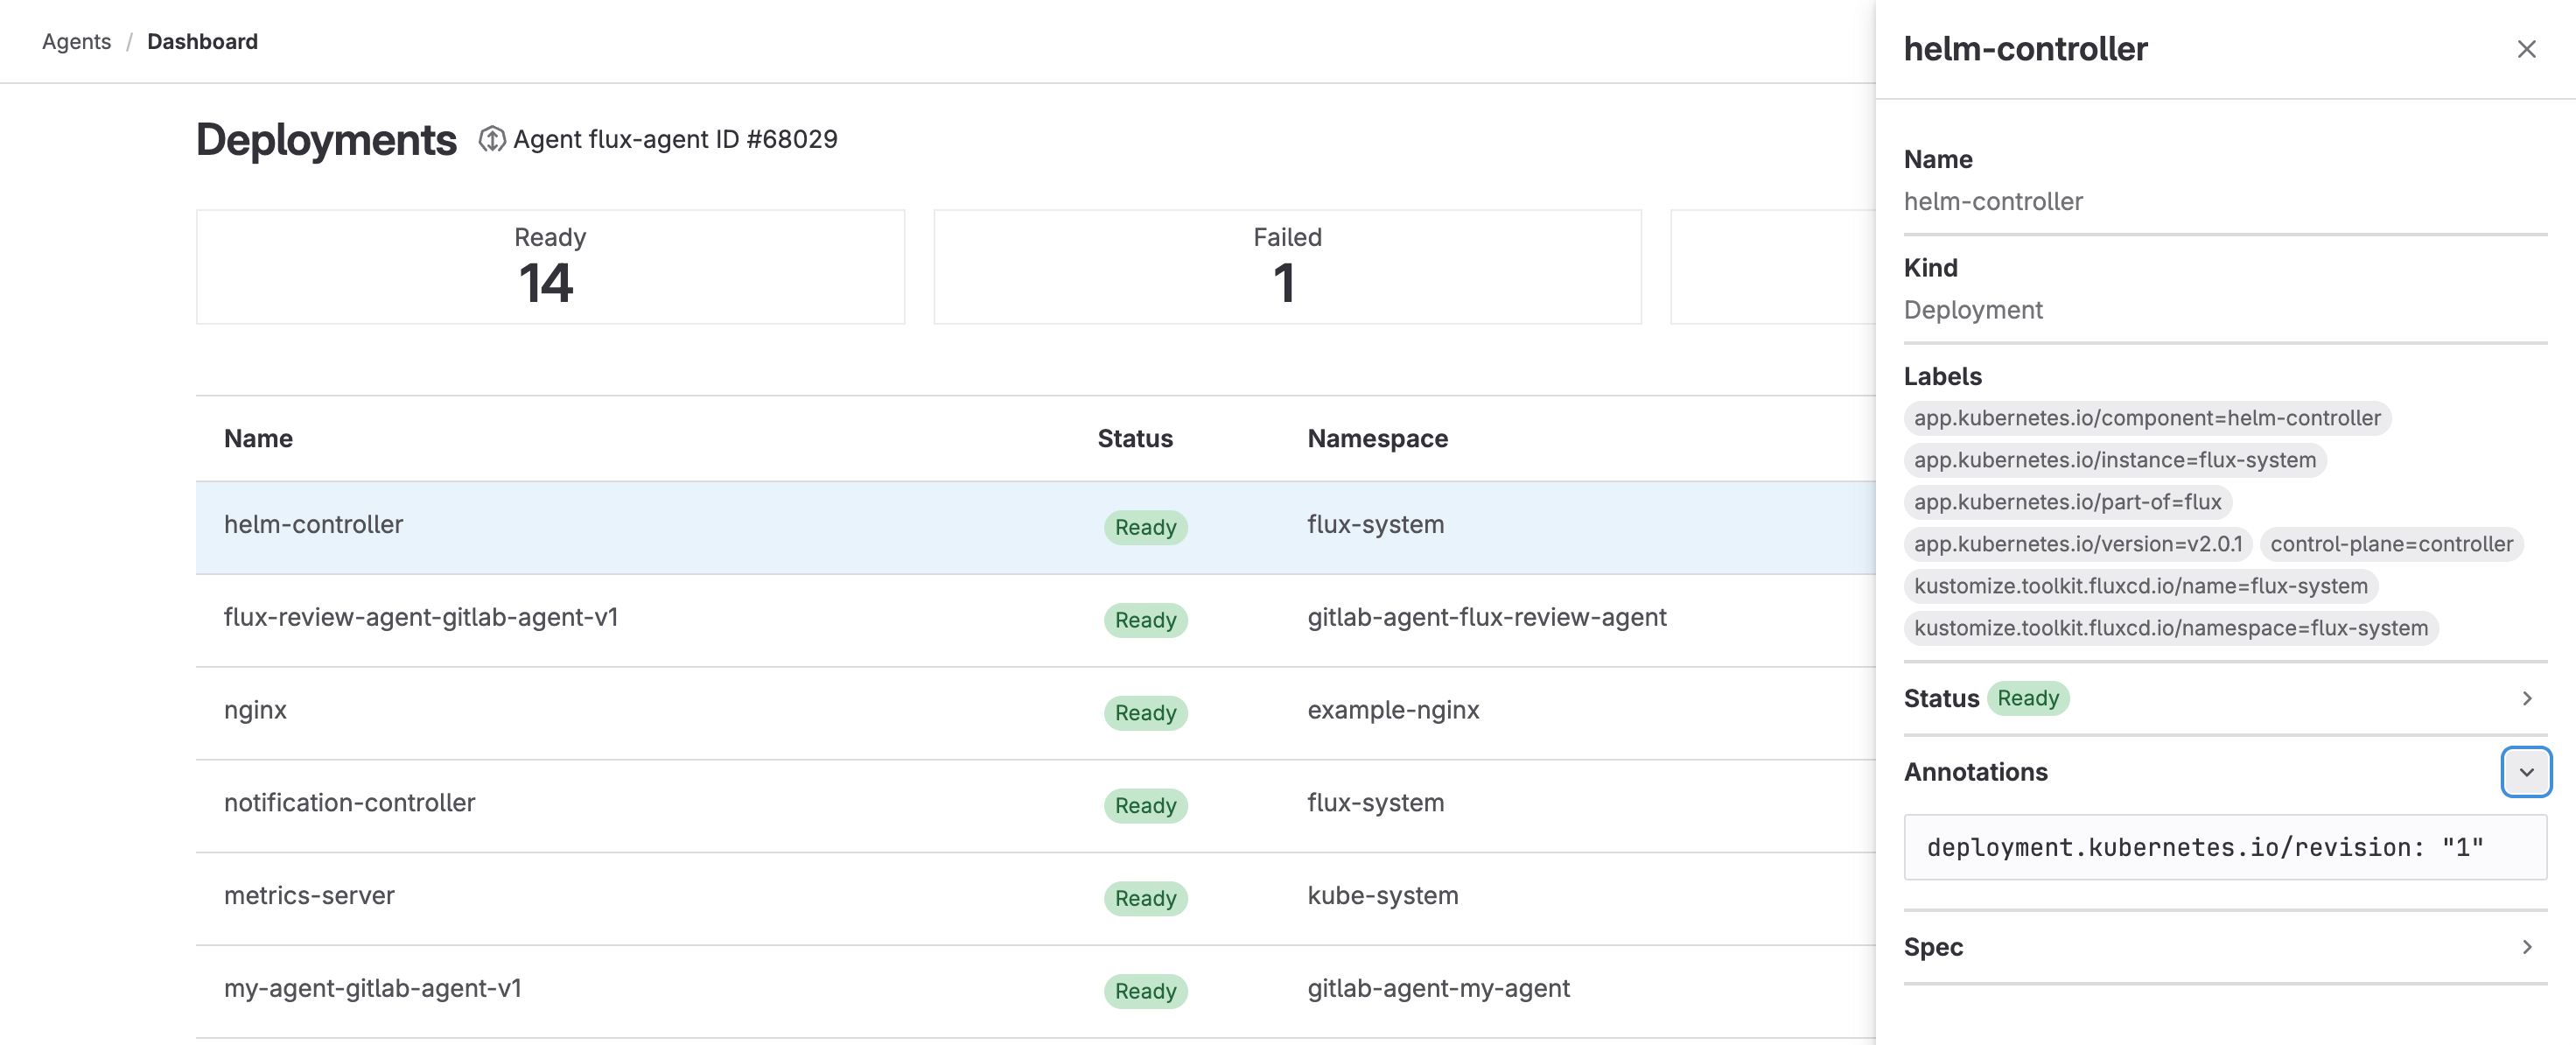
The detailed dashboard provides information about the following Kubernetes resources:
- Pods
- Services
- Deployments
- ReplicaSets
- StatefulSets
- DaemonSets
- Jobs
- CronJobs
Each dashboard displays a list of resources with their statuses, namespaces, and age. You can select a resource to open a drawer with more information, including labels and YAML-formatted status, annotations, and spec.
Because of the focus shift described in this issue, work on the detailed dashboard is paused.
To provide feedback on the detailed dashboard, see issue 460279.
View a detailed dashboard
Prerequisites:
- A GitLab agent for Kubernetes is configured and shared with the environment’s project, or its parent group, using the
user_accesskeyword.
The detailed dashboard is not linked from the sidebar navigation. To view a detailed dashboard:
- Find your agent for Kubernetes ID:
- On the left sidebar, select Search or go to and find your project.
- Select Operate > Kubernetes clusters.
- Copy the numerical ID of the agent you want to access.
-
Go to one of the following URLs, replacing
<agent_id>with your agent ID:Resource type URL Pods https://myinstance.gitlab.com/-/kubernetes/<agent_id>/podsServices https://myinstance.gitlab.com/-/kubernetes/<agent_id>/servicesDeployments https://myinstance.gitlab.com/-/kubernetes/<agent_id>/deploymentsReplicaSets https://myinstance.gitlab.com/-/kubernetes/<agent_id>/replicaSetsStatefulSets https://myinstance.gitlab.com/-/kubernetes/<agent_id>/statefulSetsDaemonSets https://myinstance.gitlab.com/-/kubernetes/<agent_id>/daemonSetsJobs https://myinstance.gitlab.com/-/kubernetes/<agent_id>/jobsCronJobs https://myinstance.gitlab.com/-/kubernetes/<agent_id>/cronJobs
Troubleshooting
When working with the dashboard for Kubernetes, you might encounter the following issues.
User cannot list resource in API group
You might get an error that states Error: services is forbidden: User "gitlab:user:<user-name>" cannot list resource "<resource-name>" in API group "" at the cluster scope.
This error happens when a user is not allowed to do the specified operation in the Kubernetes RBAC.
To resolve, check your RBAC configuration. If the RBAC is properly configured, contact your Kubernetes administrator.
GitLab agent dropdown list is empty
When you configure a new environment, the GitLab agent dropdown list might be empty, even if you have configured Kubernetes clusters.
To populate the GitLab agent dropdown list, grant an agent Kubernetes access with the user_access keyword.

