- Repository verification
- Using checksums to compare Geo sites
- Repository re-verification
- Reset verification for projects where verification has failed
- Reconcile differences with checksum mismatches
- Current limitations
Automatic background verification
Automatic background verification ensures that the transferred data matches a calculated checksum. If the checksum of the data on the primary site matches checksum of the data on the secondary site, the data transferred successfully. Following a planned failover, any corrupted data may be lost, depending on the extent of the corruption.
If verification fails on the primary site, this indicates Geo is replicating a corrupted object. You can restore it from backup or remove it from the primary site to resolve the issue.
If verification succeeds on the primary site but fails on the secondary site, this indicates that the object was corrupted during the replication process. Geo actively try to correct verification failures marking the repository to be resynced with a back-off period. If you want to reset the verification for these failures, so you should follow these instructions.
If verification is lagging significantly behind replication, consider giving the site more time before scheduling a planned failover.
Repository verification
On the primary site:
- On the left sidebar, at the bottom, select Admin.
- Select Geo > Sites.
-
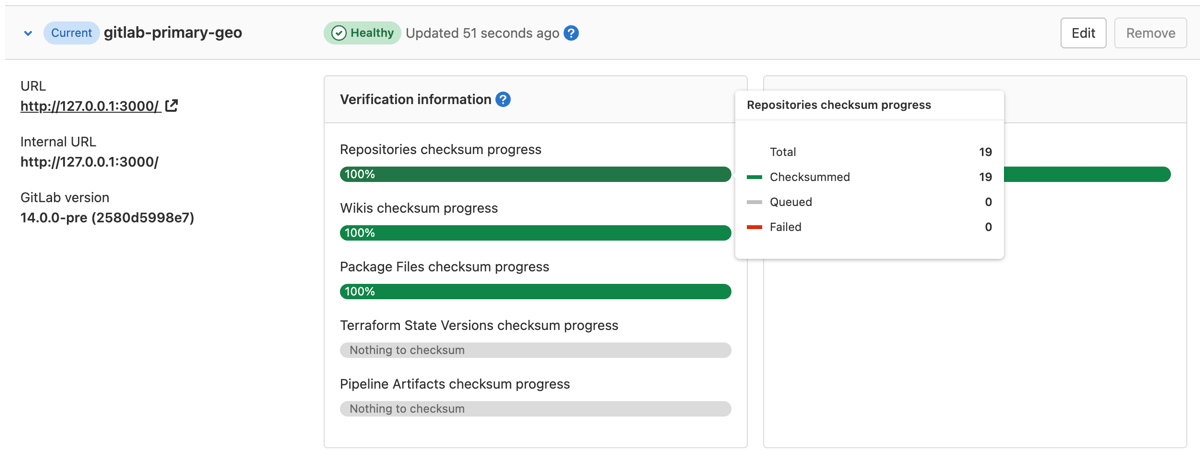
Expand Verification information tab for that site to view automatic checksumming status for repositories and wikis. Successes are shown in green, pending work in gray, and failures in red.
On the secondary site:
- On the left sidebar, at the bottom, select Admin.
- Select Geo > Sites.
-
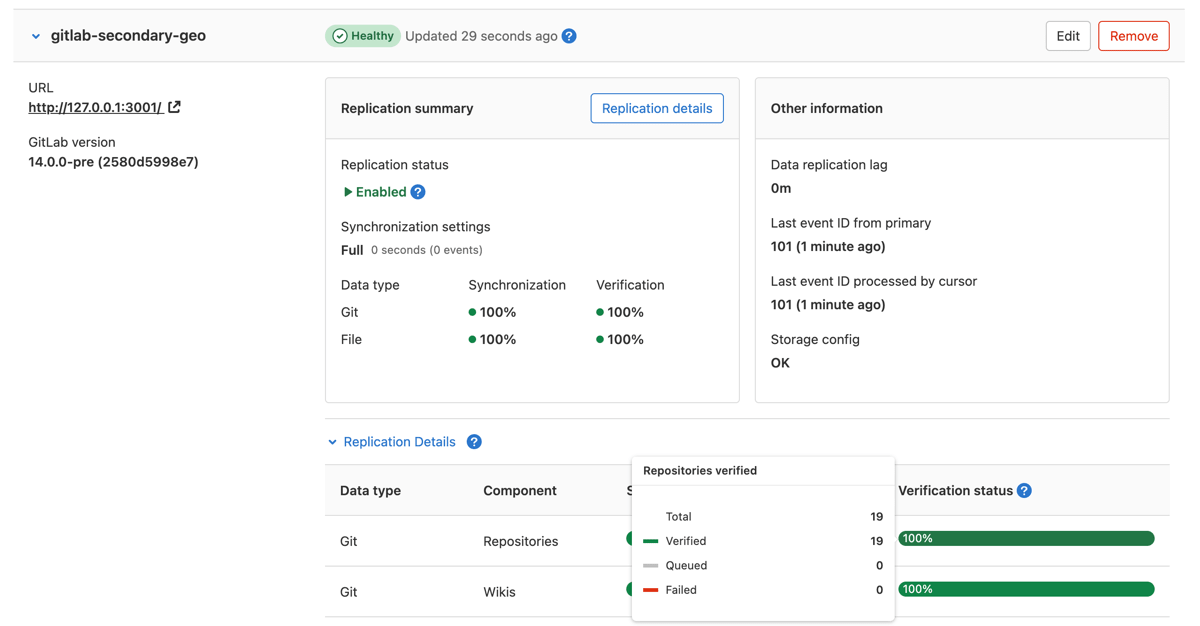
Expand Verification information tab for that site to view automatic checksumming status for repositories and wikis. Successes are shown in green, pending work in gray, and failures in red.
Using checksums to compare Geo sites
To check the health of Geo secondary sites, we use a checksum over the list of
Git references and their values. The checksum includes HEAD, heads, tags,
notes, and GitLab-specific references to ensure true consistency. If two sites
have the same checksum, then they definitely hold the same references. We compute
the checksum for every site after every update to make sure that they are all
in sync.
Repository re-verification
Due to bugs or transient infrastructure failures, it is possible for Git repositories to change unexpectedly without being marked for verification. Geo constantly reverifies the repositories to ensure the integrity of the data. The default and recommended re-verification interval is 7 days, though an interval as short as 1 day can be set. Shorter intervals reduce risk but increase load and vice versa.
On the primary site:
- On the left sidebar, at the bottom, select Admin.
- Select Geo > Sites.
-
Select Edit for the primary site to customize the minimum re-verification interval:
Reset verification for projects where verification has failed
Geo actively tries to correct verification failures marking the repository to be resynced with a back-off period. If you want to reset them manually, this Rake task marks projects where verification has failed or the checksum mismatch to be resynced without the back-off period:
Run the appropriate commands on a Rails node on the secondary site.
For repositories:
sudo gitlab-rake geo:verification:repository:reset
For wikis:
sudo gitlab-rake geo:verification:wiki:reset
Reconcile differences with checksum mismatches
If the primary and secondary sites have a checksum verification mismatch, the cause may not be apparent. To find the cause of a checksum mismatch:
- On the primary site:
- On the left sidebar, at the bottom, select Admin.
- On the left sidebar, select Overview > Projects.
- Find the project that you want to check the checksum differences and select its name.
- On the project administration page, get the values in the Storage name and Relative path fields.
-
On a Gitaly node on the primary site and a Gitaly node on the secondary site, go to the project’s repository directory. If using Gitaly Cluster, check that it is in a healthy state before running these commands.
The default path is
/var/opt/gitlab/git-data/repositories. Ifgit_data_dirsis customized, check the directory layout on your server to be sure:cd /var/opt/gitlab/git-data/repositories-
Run the following command on the primary site, redirecting the output to a file:
git show-ref --head | grep -E "HEAD|(refs/(heads|tags|keep-around|merge-requests|environments|notes)/)" > primary-site-refs -
Run the following command on the secondary site, redirecting the output to a file:
git show-ref --head | grep -E "HEAD|(refs/(heads|tags|keep-around|merge-requests|environments|notes)/)" > secondary-site-refs -
Copy the files from the previous steps on the same system, and do a diff between the contents:
diff primary-site-refs secondary-site-refs
-
Current limitations
For more information on what replication and verification methods are supported, see the supported Geo data types.


