- Types of labels
- Assign and unassign labels
- View available labels
- Create a label
- Edit a label
- Delete a label
- Promote a project label to a group label
- Promote a subgroup label to the parent group
- Generate default project labels
- Scoped labels
- Receive notifications when a label is used
- Set label priority
- Lock labels when a merge request is merged
- Related topics
Labels
Labels are a way to categorize and filter issues, merge requests, and epics in GitLab.
As your projects grow in GitLab, it gets more challenging to keep track of the work that’s done. Especially as your organization grows from just a few people to hundreds or thousands. With labels, you can organize and tag your work, and track the work items you’re interested in.
Labels are a key part of issue boards.
Use labels on epics, issues, and merge requests to:
- Categorize items using colors and descriptive titles like
bug,feature request, ordocs. - Dynamically filter and manage items to view work that’s in progress or completed.
- Search lists and boards.
- Communicate priority or severity of items, using scoped labels.
Types of labels
You can use two types of labels in GitLab:
- Project labels can be assigned to issues and merge requests in that project only.
- Group labels can be assigned to issues, merge requests, and epics in any project in the selected group or its subgroups.
Assign and unassign labels
- Real-time updates in the sidebar introduced in GitLab 14.10 with a feature flag named
realtime_labels, disabled by default. - Real-time updates in the sidebar enabled on GitLab.com in GitLab 15.1.
- Real-time updates in the sidebar enabled by default in GitLab 15.5.
- Real-time updates in the sidebar generally available in GitLab 15.6. Feature flag
realtime_labelsremoved.
You can assign labels to any issue, merge request, or epic.
Changed labels are immediately visible to other users, without refreshing the page, on the following:
- Epics
- Incidents
- Issues
- Merge requests
To assign or unassign a label:
- In the Labels section of the sidebar, select Edit.
- In the Assign labels list, search for labels by typing their names. You can search repeatedly to add more labels. The selected labels are marked with a checkmark.
- Select the labels you want to assign or unassign.
- To apply your changes to labels, select X next to Assign labels or select any area outside the label section.
Alternatively, to unassign a label, select the X on the label you want to unassign.
You can also assign and unassign labels with quick actions:
- Assign labels with
/label. - Remove labels with
/unlabel. - Remove all labels and assign new ones with
/relabel.
View available labels
View project labels
To view the project’s labels:
- On the left sidebar, select Search or go to and find your project.
- Select Manage > Labels.
Or:
- View an issue or merge request.
- On the right sidebar, in the Labels section, select Edit.
- Select Manage project labels.
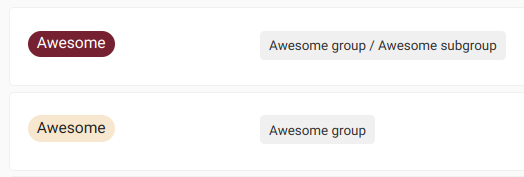
The list of labels includes both the labels created in the project and all labels created in the project’s ancestor groups. For each label, you can see the project or group path where it was created.
View group labels
To view the group’s labels:
- On the left sidebar, select Search or go to and find your group.
- Select Manage > Labels.
Or:
- View an epic.
- On the right sidebar, in the Labels section, select Edit.
- Select Manage group labels.
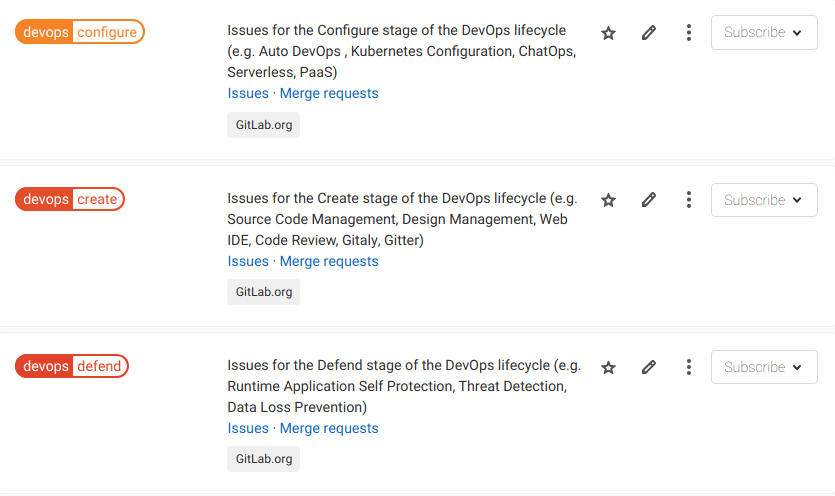
The list includes all labels created only in the group. It does not list any labels created in the group’s projects.
Create a label
Prerequisites:
- You must have at least the Reporter role for the project or group.
Create a project label
To create a project label:
- On the left sidebar, select Search or go to and find your project.
- Select Manage > Labels.
- Select New label.
- In the Title field, enter a short, descriptive name for the label. You can also use this field to create scoped, mutually exclusive labels.
- Optional. In the Description field, enter additional information about how and when to use this label.
- Optional. Select a color by selecting from the available colors, or enter a hex color value for a specific color in the Background color field.
- Select Create label.
Create a project label from an issue or merge request
You can also create a new project label from an issue or merge request. Labels you create this way belong to the same project as the issue or merge request.
Prerequisites:
- You must have at least the Reporter role for the project.
To do so:
- View an issue or merge request.
- On the right sidebar, in the Labels section, select Edit.
- Select Create project label.
- Fill in the name field. You can’t specify a description if creating a label this way. You can add a description later by editing the label.
- Select a color by selecting from the available colors, or enter a hex color value for a specific color.
- Select Create. Your label is created and selected.
Create a group label
To create a group label:
- On the left sidebar, select Search or go to and find your group.
- Select Manage > Labels.
- Select New label.
- In the Title field, enter a short, descriptive name for the label. You can also use this field to create scoped, mutually exclusive labels.
- Optional. In the Description field, enter additional information about how and when to use this label.
- Optional. Select a color by selecting from the available colors, or enter a hex color value for a specific color in the Background color field.
- Select Create label.
Create a group label from an epic
You can also create a new group label from an epic. Labels you create this way belong to the same group as the epic.
Prerequisites:
- You must have at least the Reporter role for the group.
To do so:
- View an epic.
- On the right sidebar, in the Labels section, select Edit.
- Select Create group label.
- Fill in the name field. You can’t specify a description if creating a label this way. You can add a description later by editing the label.
- Select a color by selecting from the available colors,enter input a hex color value for a specific color.
- Select Create.
Edit a label
Prerequisites:
- You must have at least the Reporter role for the project or group.
Edit a project label
To edit a project label:
- On the left sidebar, select Search or go to and find your project.
- Select Manage > Labels.
- Next to the label you want to edit, select the vertical ellipsis (), and then select Edit.
- Select Save changes.
Edit a group label
To edit a group label:
- On the left sidebar, select Search or go to and find your group.
- Select Manage > Labels.
- Next to the label you want to edit, select the vertical ellipsis (), and then select Edit.
- Select Save changes.
Delete a label
Prerequisites:
- You must have at least the Reporter role for the project.
Delete a project label
To delete a project label:
- On the left sidebar, select Search or go to and find your project.
- Select Manage > Labels.
- Next to the Subscribe button, select (), and then select Delete.
Delete a group label
To delete a group label:
- On the left sidebar, select Search or go to and find your group.
- Select Manage > Labels.
-
Either:
- Next to the Subscribe button, select ().
- Next to the label you want to edit, select Edit ().
- Select Delete.
Promote a project label to a group label
You might want to make a project label available for other projects in the same group. Then, you can promote the label to a group label.
If other projects in the same group have a label with the same title, they are all merged with the new group label. If a group label with the same title exists, it is also merged.
Prerequisites:
- You must have at least the Reporter role for the project.
- You must have at least the Reporter role for the project’s parent group.
To promote a project label to a group label:
- On the left sidebar, select Search or go to and find your project.
- Select Manage > Labels.
- Next to the Subscribe button, select the three dots () and select Promote to group label.
All issues, merge requests, issue board lists, issue board filters, and label subscriptions with the old labels are assigned to the new group label.
The new group label has the same ID as the previous project label.
Promote a subgroup label to the parent group
It’s not possible to directly promote a group label to the parent group. To achieve this, use the following workaround.
Prerequisites:
- There must be a group that contains subgroups (“parent group”).
- There must be a subgroup in the parent group, that has a label you want to promote.
- You must have at least the Reporter role for both groups.
To “promote” the label to the parent group:
- In the parent group, create a label with the same name as the original one. We recommend making it a different color so you don’t mistake the two while you’re doing this.
-
In the subgroup, view its labels. You should see the two labels and where they come from:
- Next to the subgroup label (the old one), select Issues, Merge requests, or Epics.
- Add the new label to issues, merge requests, and epics that have the old label. To do it faster, use bulk editing.
- In the subgroup or the parent group, delete the label that belongs to the lower-level group.
You should now have a label in the parent group that is named the same as the old one, and added to the same issues, MRs, and epics.
Generate default project labels
If a project or its parent group has no labels, you can generate a default set of project labels from the label list page.
Prerequisites:
- You must have at least the Reporter role for the project.
- The project must have no labels present.
To add the default labels to the project:
- On the left sidebar, select Search or go to and find your project.
- Select Manage > Labels.
- Select Generate a default set of labels.
The following labels are created:
bugconfirmedcriticaldiscussiondocumentationenhancementsuggestionsupport
Scoped labels
Teams can use scoped labels to annotate issues, merge requests, and epics with mutually exclusive labels. By preventing certain labels from being used together, you can create more complex workflows.
A scoped label uses a double-colon (::) syntax in its title, for example: workflow::in-review.
An issue, merge request, or epic cannot have two scoped labels, of the form key::value,
with the same key. If you add a new label with the same key but a different value,
the previous key label is replaced with the new label.
Filter by scoped labels
To filter issue, merge request, or epic lists by a given scope, enter
<scope>::* in the searched label name.
For example, filtering by the platform::* label returns issues that have platform::iOS,
platform::Android, or platform::Linux labels.
Scoped labels examples
Example 1. Updating issue priority:
- You decide that an issue is of low priority, and assign it the
priority::lowlabel. - After more review, you realize the issue’s priority is higher increased, and you assign it the
priority::highlabel. - Because an issue shouldn’t have two priority labels at the same time, GitLab removes the
priority::lowlabel.
Example 2. You want a custom field in issues to track the operating system platform that your features target, where each issue should only target one platform.
You create three labels:
platform::iOSplatform::Androidplatform::Linux
If you assign any of these labels to an issue automatically removes any other existing label that
starts with platform::.
Example 3. You can use scoped labels to represent the workflow states of your teams.
Suppose you have the following labels:
workflow::developmentworkflow::reviewworkflow::deployed
If an issue already has the label workflow::development and a developer wants to show that the
issue is now under review, they assign the workflow::review, and the workflow::development label
is removed.
The same happens when you move issues across label lists in an issue board. With scoped labels, team members not working in an issue board can also advance workflow states consistently in issues themselves.
For a video explanation, see:
Nested scopes
You can create a label with a nested scope by using multiple double colons :: when creating
it. In this case, everything before the last :: is the scope.
For example, if your project has these labels:
workflow::backend::reviewworkflow::backend::developmentworkflow::frontend::review
An issue can’t have both workflow::backend::review and workflow::backend::development
labels at the same time, because they both share the same scope: workflow::backend.
On the other hand, an issue can have both workflow::backend::review and workflow::frontend::review
labels at the same time, because they both have different scopes: workflow::frontend and workflow::backend.
Receive notifications when a label is used
You can subscribe to a label to receive notifications whenever the label is assigned to an issue, merge request, or epic.
To subscribe to a label:
- View the label list page.
- To the right of any label, select Subscribe.
- Optional. If you are subscribing to a group label from a project, select either:
- Subscribe at project level to be notified about events in this project.
- Subscribe at group level to be notified about events in the whole group.
Set label priority
Labels can have relative priorities, which are used when you sort issue and merge request lists by label priority and priority.
When prioritizing labels, you must do it from a project. It’s not possible to do it from the group label list.
Prerequisites:
- You must have at least the Reporter role for the project.
To prioritize a label:
- On the left sidebar, select Search or go to and find your project.
- Select Manage > Labels.
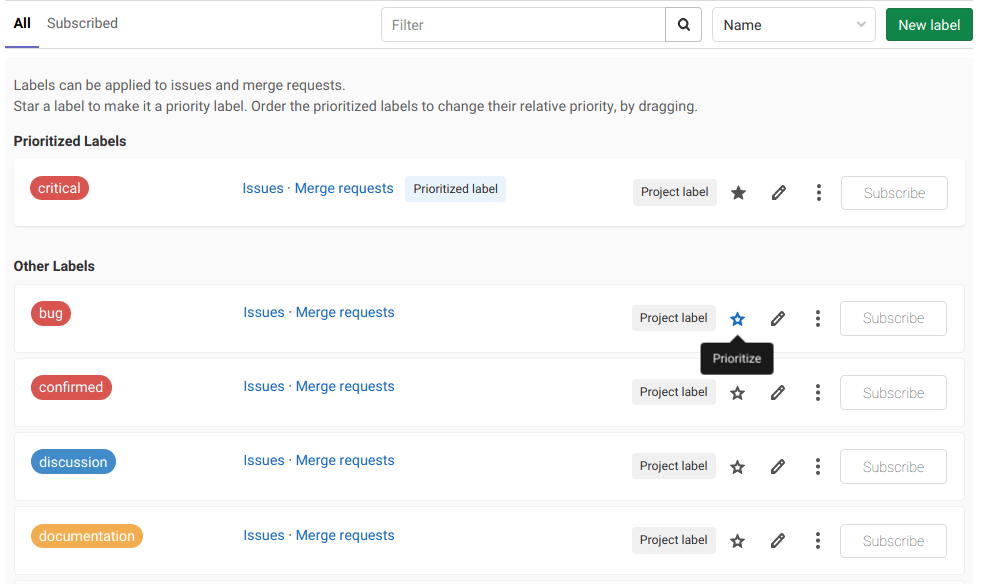
- Next to a label you want to prioritize, select the star ().
This label now appears at the top of the label list, under Prioritized Labels.
To change the relative priority of these labels, drag them up and down the list. The labels higher in the list get higher priority.
To learn what happens when you sort by priority or label priority, see Sorting and ordering issue lists.
Lock labels when a merge request is merged
-
Introduced in GitLab 16.3 with a flag named
enforce_locked_labels_on_merge. This feature is beta. Disabled by default.
To comply with certain auditing requirements, you can set a label to be locked. When a merge request with locked labels gets merged, nobody can remove them from the MR.
When you add locked labels to issues or epics, they behave like regular labels.
Prerequisites:
- You must have at least the Reporter role for the project or group.
To set a label to get locked on merge:
- On the left sidebar, select Search or go to and find your group or project.
- Select Manage > Labels.
- Next to the label you want to edit, select the vertical ellipsis (), and then select Edit.
- Select the Lock label after a merge request is merged checkbox.
- Select Save changes.
Related topics
Practice working with labels in the following tutorials:


